
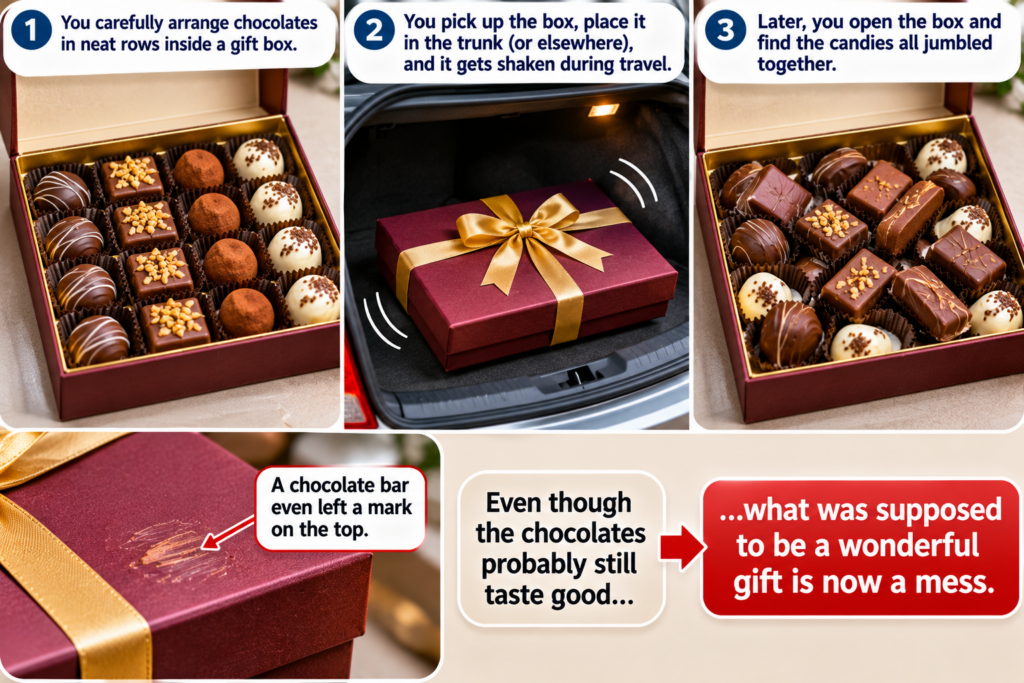
When you open a candy box you realize that all the candies in there are jumbled together because you had originally organized them in rows. When you picked up the box and put it back in the trunk (or wherever) it was obviously shaken. Some of the chocolate bars were lying sideways; one even left a mark on the top. Even though they probably taste good, what was supposed to be a wonderful gift is now a mess.
Most of this happens because of wasted space. There must be some space for the candies themselves, but if there’s too much space then the candies start sliding. Every time you stop to go somewhere, the free movement of the loose candies increases the likelihood of them rubbing against each other. And soft centers, thin shells, and fragile design elements are usually ruined before they reach the consumer.
How do you find a better match? Begin with the candy. Take out the same number of candies you intend to package. Add the paper cups, liners, or trays used to hold the candy. Measure how much space the entire assortment takes. It doesn’t matter if you only measured the candies themselves – when you add everything else, the box may feel too small.
The depth of the box is just as important as its height. A tall truffle requires more clearance above it than a flat piece of toffee. If the top is pressed onto the candy, it could damage a topping or create dents. But a very deep box allows for many small items to fall over. Enough room exists so that you can shut the lid without providing a pathway for the candy to roll and spill.
Candy paper cups help keep individual candies separated, but they work best when they fit snugly into the container. Paper cups placed away from each other will move along with the rest of the candy. Inserts that provide separate areas for each candy can keep each piece more securely in position. Anything that contacts non-wrapped candy should be designed for such use.
Also consider how customers will hold the box. Customers may hold it level at your counter and then put it into a shopping bag. A gift may travel on a car seat or sit in someone’s lap. Although a candy box looks perfectly aligned when sitting on a shelf, it still must endure those minor tilts that occur during transportation.
Perform a simple test prior to filling your orders. Pack one box exactly as you normally would. Shut it. Carry it around. Gently rock it side-to-side like a customer. Reopen it and inspect the rows. While this won’t mimic every trip, it will allow you to identify any weak areas while there’s still time to correct them.
Special care must be taken when packaging mixed candy sets. A large cluster of candy and a small dollop of creme don’t occupy the same volume. Placing both into equally-sized compartments may cause either the cluster to become cramped or the creme to become dislodged. You may achieve better results through altering the pattern of placement or utilizing a tray specifically designed for that type of mix.
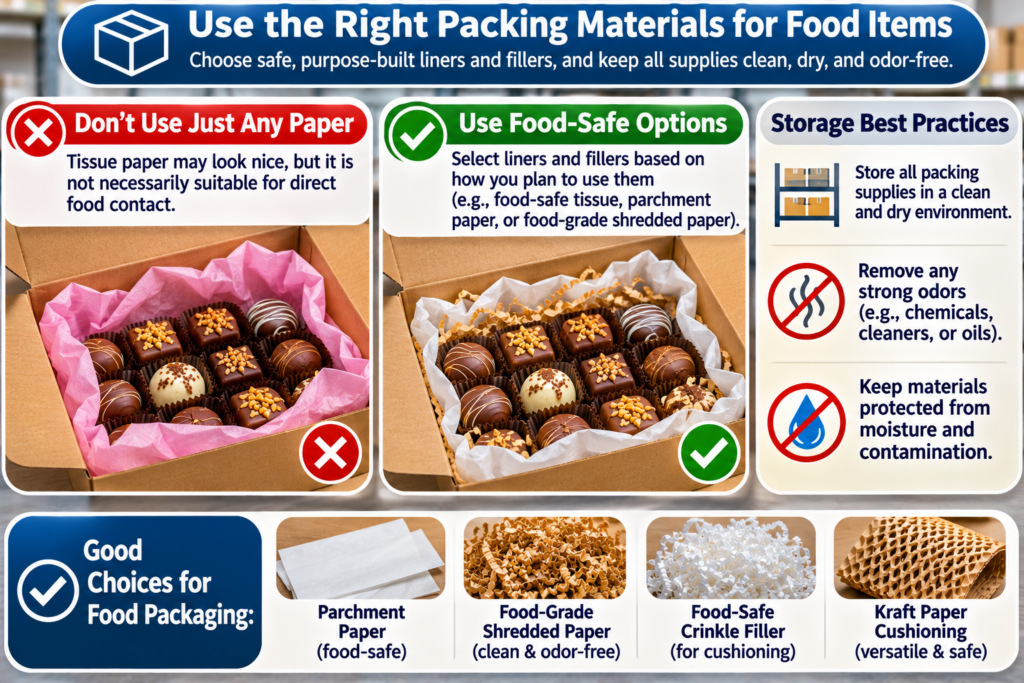
Don’t fill voids with whatever paper you happen to have handy. Tissue paper may appear visually appealing; however, it is not necessarily suitable for direct food contact. Select liners and fillers based upon how you plan to utilize them. Store all packing supplies in a clean and dry environment and remove any strong odors.
Each gift you pack should remain aesthetically pleasing after opening. Most times, achieving this doesn’t require larger boxes, additional fillers, or decorative ribbons. Typically, achieving these calls for nothing more than making a few accurate measurements and testing it out. Properly packaged gifts enable each piece to retain its original orientation, so customers see the same tidy arrangement as did you when you packed it.
